Yeast Pancakes
Baking and Desserts • Russian
Description
Traditionally, recipes for pancake batter with the addition of yeast have been particularly popular in Russia. A chef from a well-known cooking guide distinguishes Russian pancakes from European crepes by this feature, where baking soda or soured milk is used instead of yeast. Yeast dough needs to be allowed to rise in a warm place—it should double in volume, become sticky, and be covered with bubbles. After baking, each pancake should be brushed with melted or butter: this will prevent the delicate, hole-filled pancakes from sticking together, and they will remain soft and pleasant to the touch even the next day.
Ingredients
- Milk 25 fl oz
- Chicken Egg 4 pieces
- Sugar 5 oz
- Salt 0 oz
- Wheat Flour 15 oz
- Dry yeast 0 oz
- Butter 5 oz
Step-by-Step Guide
Step 1
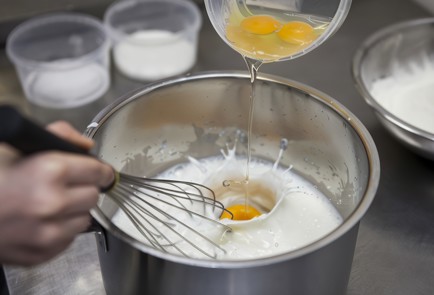
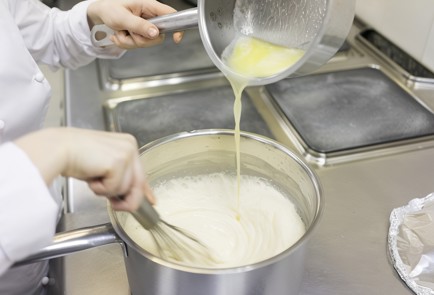
In warm milk, add the eggs and begin to whisk them. Without waiting for the yolks to fully break, continue whisking the eggs and add the sugar and salt. The warmer the milk, the quicker and easier the sugar will dissolve, but it should not be hot to avoid cooking the eggs.
Step 2
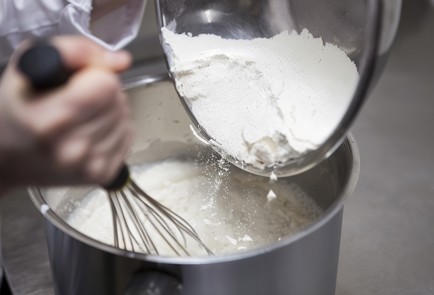
Add sifted premium wheat flour to the milk. This should be done slowly, allowing the flour to gradually incorporate into the batter rather than dropping it all in at once. Mix the batter thoroughly to avoid any lumps.
Step 3
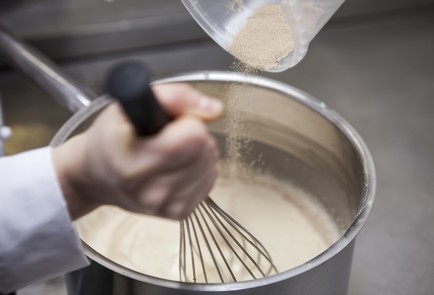
After 1 minute, add the yeast to the dough. Mix the dough for another 5 minutes. To make it easier, you can use a mixer. After 5 minutes, the yeast will start to work: the first bubbles will appear on the surface. Cover the bowl with foil and place it in a warm spot for 30 minutes. Ideally, position the dough near the stove so that the air temperature around the pot is higher than room temperature.
Step 4
After that, add 160 grams of melted hot butter to the dough, mix it in, and then return the pot to a warm place for another 15 minutes.
Step 5
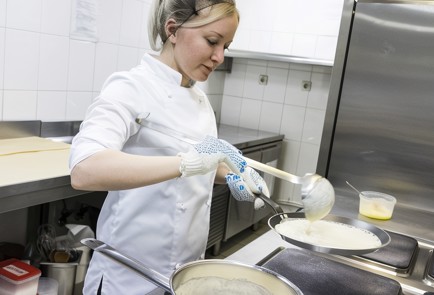
And finally, the dough is ready. By the time you start frying, it should have doubled in size, become stretchy, and be covered with bubbles. Heat the skillet well. You can fry pancakes in both a cast-iron skillet and a non-stick skillet — the main thing is that it is well heated. However, the ideal yeast pancakes will turn out best in a cast-iron skillet over gas. Use a ladle to scoop the batter and pour it into the skillet. It's better to hold the skillet in the air while tilting it from side to side, allowing the batter to spread evenly across the surface. Because the batter is thick, the pancake may start to fry before it covers the entire skillet, so speed is important.
Step 6
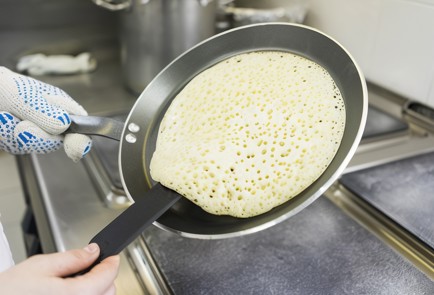
After 1–2 minutes, the surface of the pancake will be covered with small holes, the edges will be browned, and the surface of the batter will become matte and resemble wax. This indicates that the pancake is ready to be flipped. If the holes that have formed suddenly fill back in with batter, do not flip the pancake yet; it is not fully cooked. Use a wide or long spatula to flip the pancake to prevent it from flopping in the air and tearing. Cook the pancake in such a way that it only needs to be flipped once.
Step 7
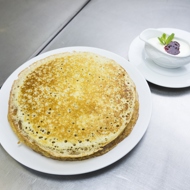
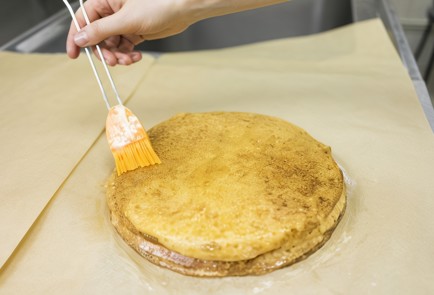
Place the finished pancakes one by one onto a plate and, while they are still hot, brush each one with melted butter. The hot pancake will quickly absorb the warm butter, making it even more delicious. Additionally, after this step, the pancakes will dry out more slowly and will remain soft and pleasant to the touch even the next day.
Cooked This Dish? Share Your Creation!
Snap a photo and let your culinary masterpiece inspire others.
Users Photos
No photos yet. Be the first to share!