Estherhazy
Baking and Desserts • Hungarian
Description
The Estherhazy cake is easily recognizable by its decorative glaze. It features a fondant glaze with a chocolate pattern, as well as apricot jam and almonds. The result is delicate and sweet, with the jam adding a touch of tartness to the overall flavor. A significant amount of almonds is required, as they are included in the batter and used to decorate the cake.
Ingredients
- Almond 10 oz
- Egg white 10 oz
- Sugar 25 oz
- Milk 10 fl oz
- Vanilla salt 0 oz
- Whole egg 0 oz
- Butter 15 oz
- Almond 5 oz
- Kirsch 0 fl oz
- Corn Starch 0 oz
- Wheat Flour 0 oz
- Meyer Lemon Juice 1 tablespoon
- Apricot Jam 5 oz
- Cocoa Powder 0 oz
- Chopped almonds 5 oz
Step-by-Step Guide
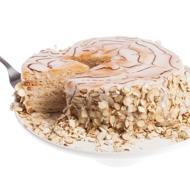
Step 1
In a saucepan, combine 500 grams of sugar with 150 ml of water. Place over heat and bring to a boil, cooking for 3–4 minutes. Add a teaspoon of lemon juice and boil for another minute. Then, raise the temperature to 240°F, remove from heat, pour the syrup into a clean container, and let it cool to 40–120°F.
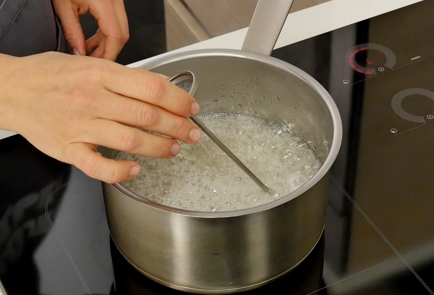
Step 2
Whip the cooled syrup with a wooden spoon for 15 to 30 minutes. During this time, the syrup should turn white and thicken slightly. Cover the resulting frosting with plastic wrap and leave it at room temperature for 2 to 3 hours.
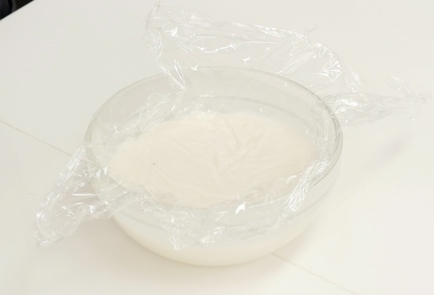
Step 3
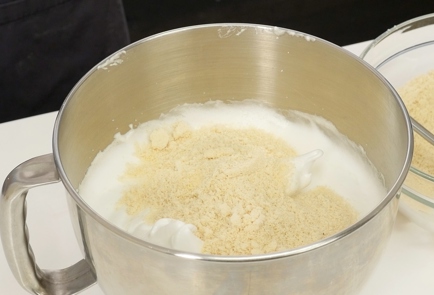
It's recommended to age the egg whites for the cake layers; to do this, cover them with plastic wrap, ensuring it touches the surface of the whites, and leave them at room temperature overnight. Beat the egg whites until soft peaks form, then, while continuing to beat, gradually add the sugar in a thin stream and beat until stiff peaks form.
Step 4
Add the sifted almond flour to the egg whites and gently fold it in, moving from the bottom to the top. Transfer the batter to a piping bag.
Step 5
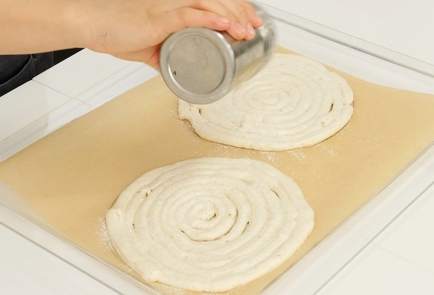
Pipe the dough onto parchment paper in the shape of round layers. For greater accuracy, you can draw circles on the back of the paper. You should end up with 6 layers, each 23 cm in diameter. Sprinkle the layers with powdered sugar, leave for 10 minutes, then sprinkle with powdered sugar again and place in an oven preheated to 340°F for 25 minutes. Allow the finished layers to cool to room temperature.
Step 6
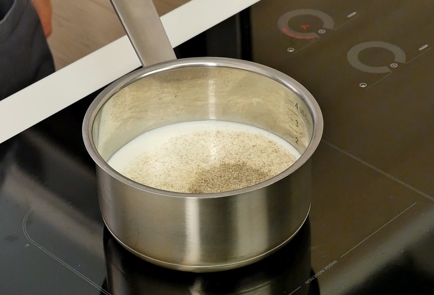
In a small saucepan, bring 250 ml of milk to a boil along with 75 grams of sugar and vanilla sugar. In a separate bowl, lightly whisk the remaining milk with the egg yolks, then add the wheat flour and starch, mixing until smooth. While continuously whisking, gradually pour the hot milk into the egg yolk mixture, then transfer everything back to the saucepan. Place it over low heat and stir with a whisk until the mixture thickens. Be careful not to let the cream boil.
Step 7
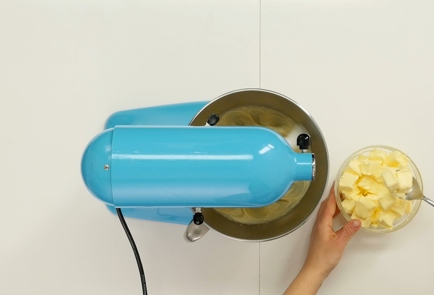
Transfer the resulting cream to a mixing bowl and beat at medium speed until it cools to room temperature. This will take about 10–15 minutes. Gradually add the butter while continuing to beat, then add the nougat and kirsch.

Step 8
Assemble the cake, spreading cream on each layer. Place the top layer smooth side up and do not cover it with cream. Gently press down on the cake from the top, spreading the cream along the sides of the cake.
Step 9
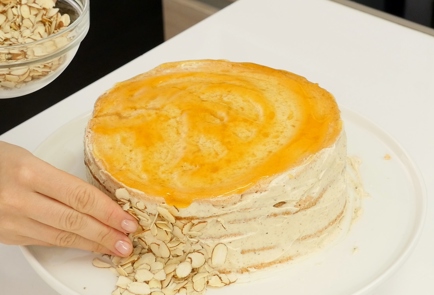
Gently heat the apricot jam in a saucepan until it becomes a bit more liquid, then strain it through a sieve. Spread the jam over the top layer of the cake. Sprinkle the sides of the cake with almonds and refrigerate for one hour.
Step 10
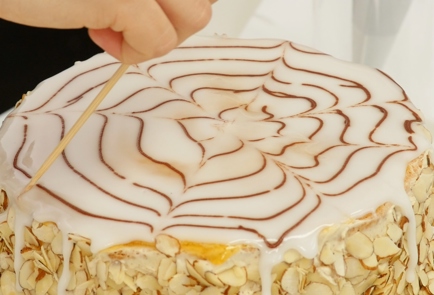
Mix a small portion of the sugar fondant with cocoa and transfer it to a piping bag fitted with a very small round tip. Cover the top of the cake with the white fondant, draw circles on it with the chocolate fondant, and quickly drag a skewer or toothpick through them to create a web-like pattern. Place the finished cake in the refrigerator overnight.
Cooked This Dish? Share Your Creation!
Snap a photo and let your culinary masterpiece inspire others.
Users Photos
No photos yet. Be the first to share!